I had to share this awesome video of the teachers at my kids' school. The kids had a sing along today and just look what happened! (the elf is the school principal!)
Happy Holidays...I hope you all enjoy your families and good friends this season!


Thursday, December 22, 2011
Sunday, December 18, 2011
The Winner is...
Thank you to everyone who came by and entered the Sew Mama Sew Giveaway Day. I was so pleased with the variety of geographic locations! I don't even have time to compile them right now, so I'll report that soon...besides, this is more important...The Winner of the wristlet from my etsy shop:


Lucky #10...Jennifer @ Ellison Lane Quilts! (If you're not Jennifer, and still would love the wristlet, they will be available tomorrow in my etsy shop!)
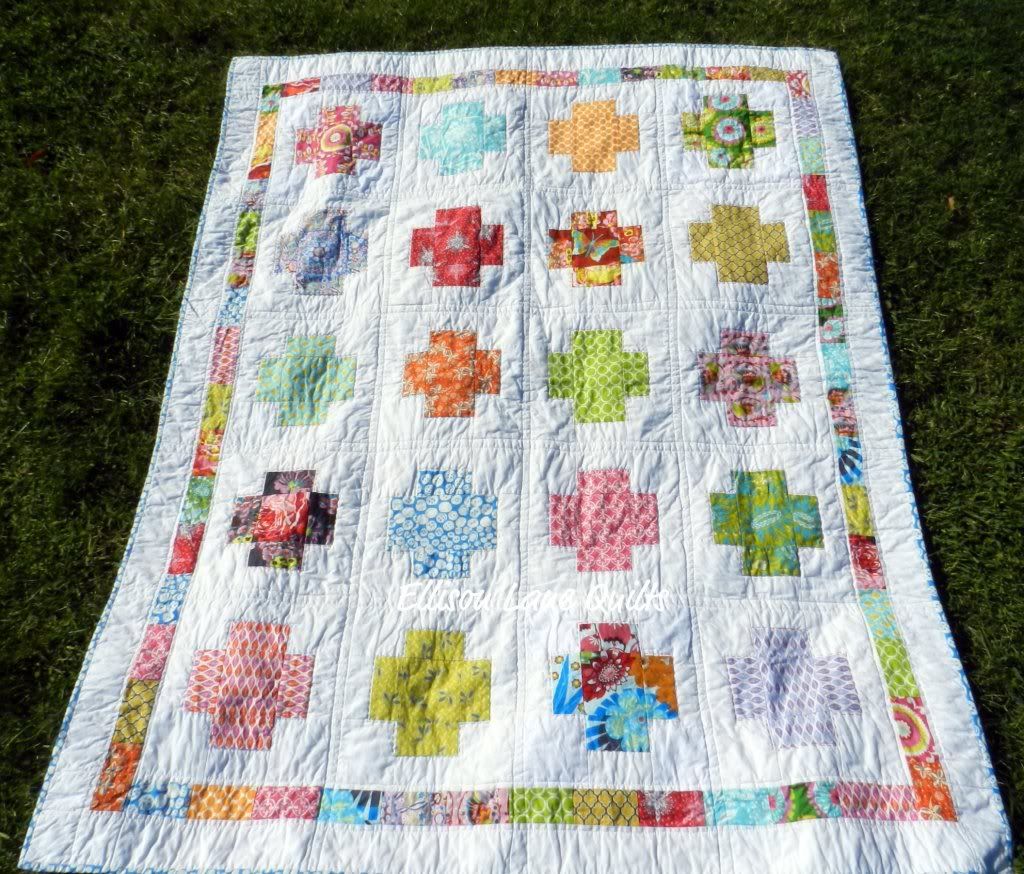
Jennifer blogs at Ellison Lane Quilts with a style that is right up my proverbial alley! She makes the most spectacular modern, fresh quilts and quilted projects. Here are a few that are simply beautiful:
My 2012 New Year's Resolution is to make (actually finish!) a quilt...new territory for me! Jennifer, if you have any tips, I could use 'em! Congrats on your win! I've sent an email to you.
Monday, December 12, 2011
Sew Mama Sew! Giveaway...week!
Welcome to Backless Shirt, the blog. Home to zero7one9 designs, my Etsy shop! I'm Jamie!

I would love for you to take a look around while you're here signing up for the Sew, Mama, Sew! giveaway...by the way, I'm in the "Handmade Bags" category.
Who doesn't love a practical gift? Especially when it's free and looks good!! Put all the essentials in this baby and go on about your business, in style! This is an exclusive fabric combination...not even available in the shop yet!


Giveaway will be open from December 12-16 at 5pm PST (that'll be 7pm central time). Winner will be chosen at random and announced (and contacted by email) here on the 17th.
To enter, it's so simple:
 I also tweet and pin, so find me there, too!
I would love for you to take a look around while you're here signing up for the Sew, Mama, Sew! giveaway...by the way, I'm in the "Handmade Bags" category.
Who doesn't love a practical gift? Especially when it's free and looks good!! Put all the essentials in this baby and go on about your business, in style! This is an exclusive fabric combination...not even available in the shop yet!

 |
| (Eek! See how new this is...I haven't even taken good pics of it yet!) |

Giveaway will be open from December 12-16 at 5pm PST (that'll be 7pm central time). Winner will be chosen at random and announced (and contacted by email) here on the 17th.
To enter, it's so simple:
- leave a comment and tell me what state you live in (I'm just curious). I'll post the results after the giveaway closes for everyone else who is curious! I need your email if you're the winner, so please don't forget that! Feel free to use a format like jamie at gmail dot com.
I also tweet and pin, so find me there, too!Wednesday, December 7, 2011
Felt Holiday Bulbs...sewing with my 5 year old!

There are few things I love more than creating with my kids. Last week, Maeve and I did some hand sewing in preparation for the holidays. We made light bulbs that we'll string up on the front door (as soon as mom makes a few more).
Please know that a hand-sewing expert, I am not. I am more like a fly-by-the-seat-of-my-pants kind of hand sewer. :)


I had so much fun with Maeve on this little project! She said she *loves* making things with Mom. Melt. My. Heart.

Sunday, November 27, 2011
make your own chenille - chevron style!
I didn't believe it would work. In fact, I set out to prove it wrong. I failed. Not only did it work, it is awesomely soft, thick, and pretty.

I am enjoying the chevron trend just as much as the next gal, so when I saw this tutorial at Aesthetic Nest, I had to give it a whirl (despite all the other projects I am supposed to be working on...). So, to make myself feel better about my lack of self-discipline, I made just a mini version from her tutorial instead of the full baby blanket. My little sample piece is more placemat size (but I love it just as much).
| Before taking a ride in my washer and dryer. |
It's so simple, it hurts! Layer up some flannel (I used 5 layers of white and a top layer of this floral). Sew along the zig zags. Bind (packaged binding is good enough for me!). Wash. Wait. Anxiously. Toss in dryer. Wait. Anxiously. Enjoy your fluffy chevron-y prettiness!
 |
| Is this a little foreshadowing of a future as a rug??? |
I am not sure what I'm going to do with my sample. It's so pretty. My mom came over, saw it and decided it'd make a great rug for under her dining room table. Crazy! But wait...that's not a bad idea. It's soft underfoot (yes, I stepped on it), machine washable, and customizable to any decor! I think my mom may be on to something...

What do you think? Would it make a nice rug? Or am I out of my mind?
Thursday, November 17, 2011
Add length to kids' pants [a tutorial]

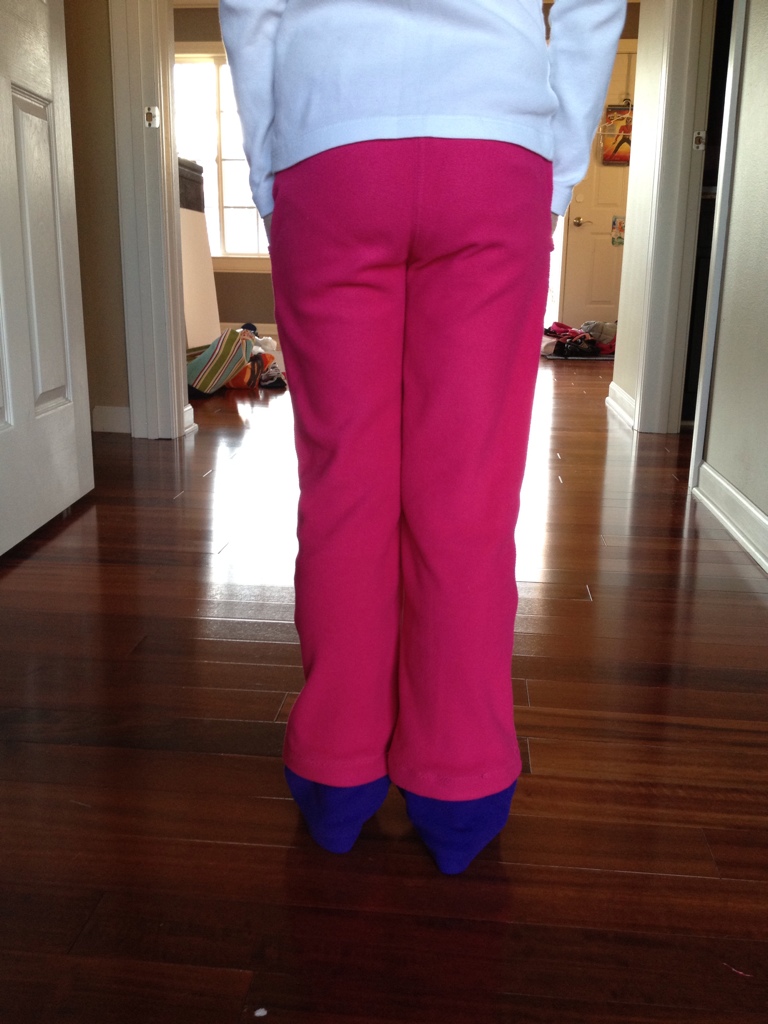
Our daughter has grown 2+ inches since March, but her waist has not grown in proportion. Don't get me wrong, I'd kill to have long legs and a too-small waist!
But when we pulled out Maeve's pants from last winter, they still fit in the waist, but were WAY too short. Most of them went in the giveaway bin, but I had an idea to extend the life of a few of her favorites warm and cuddly fleece pants.

{I have to apologize for the cruddy photos...I was doing this late at night after the kids went to bed and the lighting stinks after the sun goes down...ha!}
- Start with 2 pairs of pants (one to add the length to and one to use for fabric).

- Have your little one try on the too-short pants and measure how much additional length you need.

- Before cutting the cuff, remember to add some length for the seam allowance. I added about 3/4". Then cut the cuffs off the bottom of your other pair of pants.
- You have a decision to make here. 1) cuff on the outside of the hem and have a raw edge exposed (use only with fabrics that do not fray, like fleece or knits), or 2) raw edge hidden under the existing hem.

- Turn your pants and cuff inside out. If your pants have a seam on the outside of the leg, line up the cuff seam with the leg seam. Pin in place.

- Sew.
To do that:

- Cut two hearts (or any shape of your choice) from the remaining fleece to fit on the knee of the pants. Pin in place.

- Use a satin stitch (zig zag) and sew all the way around your shape. You'll have to do a little tugging and adjusting as you sew. Be careful not to sew the pants to themselves (like I did - doh!)

When I finished these, I went to bed and kept my fingers crossed that Maeve would love them when she saw them in the morning. And she did! She wore the to school that day! Her favorite part? The hearts!

Warning: you may be asked to add hearts to more pants after they see how awesome these are!

Sunday, October 30, 2011
2011 Costume How To...Pulp Fiction, Zombie and Power Ranger
Our 2011 family costumes and how we made them...here they are:
Luckily, Maeve opted for a store-bought Red Power Ranger Samurai. Saved me lots of time and effort! So, I could devote more time to our costumes (see below for more details) and to Ethan's homemade zombie get up.

I started with a black suit jacket. It was next to impossible to find a boys size 8 at the Goodwill. So I grabbed a women's size 4 with plans to alter it to fit. It was $3.59.
I took it home and went to work resizing. I basically undid the collar and took it in a couple inches down the back. The good news, it's a zombie costume, so it's supposed to be torn and worn, so I rough-sewed the collar back on. Then went to ripping holes in it! I got a pack of 'scary cloth' at the Dollar Tree and sewed it on around the bottom and pulled it through some of the holes. It didn't look worn enough so I grabbed some sand paper and rubbed in some holes.

Add some black pants (worn to a wedding), black tennis shoes, the white button-down I wore with my costume (see below), the black tie from dad's Beetlejuice costume, white hair paint, and some $1.97 zombie face paint and you're set!

Maeve wanted to wear Ethan's ski mask with her costume...so be it!


As for Josh and I, we took a trip back to 1994 and channeled Mrs. Mia Wallace and Vincent Vega from Pulp Fiction. Specifically, post-overdose, hence the bloody nose and syringe in the chest.

If you're familiar with the movie, you'd know that Vincent and Mia ate at a 50's diner called Jack Rabbit Slim's. It was there that they participated in a dance contest and came away with a trophy (that looks a bit like the one below)! Yep, Josh had it made at the local trophy shop. Nice touch.

One of me at the party:


Here's a close-up of the syringe in my heart. After several experiments, we found the best option: Cut an oval out of the side of a disposable tupperware container to use as the base. Drill a hole through the center. Insert a nail (we used a roofing nail b/c it has a large flat head) through the hole. Place the syringe on the nail. It should be a snug fit. You might have to tap gently to get it all the way on. Then use Spirit Gum to adhere it to your chest. Make sure you put it on the correct side. ;)

Costume Recap:
The party was so much fun. We didn't come home with a best costume victory...we better try harder next year...we have less than a year to prepare! ha!

Luckily, Maeve opted for a store-bought Red Power Ranger Samurai. Saved me lots of time and effort! So, I could devote more time to our costumes (see below for more details) and to Ethan's homemade zombie get up.

I took it home and went to work resizing. I basically undid the collar and took it in a couple inches down the back. The good news, it's a zombie costume, so it's supposed to be torn and worn, so I rough-sewed the collar back on. Then went to ripping holes in it! I got a pack of 'scary cloth' at the Dollar Tree and sewed it on around the bottom and pulled it through some of the holes. It didn't look worn enough so I grabbed some sand paper and rubbed in some holes.

Add some black pants (worn to a wedding), black tennis shoes, the white button-down I wore with my costume (see below), the black tie from dad's Beetlejuice costume, white hair paint, and some $1.97 zombie face paint and you're set!

Maeve wanted to wear Ethan's ski mask with her costume...so be it!


As for Josh and I, we took a trip back to 1994 and channeled Mrs. Mia Wallace and Vincent Vega from Pulp Fiction. Specifically, post-overdose, hence the bloody nose and syringe in the chest.

If you're familiar with the movie, you'd know that Vincent and Mia ate at a 50's diner called Jack Rabbit Slim's. It was there that they participated in a dance contest and came away with a trophy (that looks a bit like the one below)! Yep, Josh had it made at the local trophy shop. Nice touch.

One of me at the party:

Vincent's hair and side burns up close. You can see where I cut the wig back to create the hairline. Then we put it back in a pony tail and tucked the loose strands behind his ears. There was a space between the wig and burns so I "painted" his hair with my black mascara to blend it in.

Here's a close-up of the syringe in my heart. After several experiments, we found the best option: Cut an oval out of the side of a disposable tupperware container to use as the base. Drill a hole through the center. Insert a nail (we used a roofing nail b/c it has a large flat head) through the hole. Place the syringe on the nail. It should be a snug fit. You might have to tap gently to get it all the way on. Then use Spirit Gum to adhere it to your chest. Make sure you put it on the correct side. ;)

Costume Recap:
- Mia
- 'pageboy' wig (trimmed about an inch off the bangs) bought at a local pop-up Halloween store ($16)
- fake eyelashes ($1 at Target - ELF brand)
- white button down, black capris, black tank (all from my closet)
- black flats ($6 on clearance)
- make up I already had (and help from a couple You Tube videos)
- syringe (you could use a child medicine dose syringe from the pharmacy).
- trial and error to get the syringe to look right and stick out...let's just say it's good we planned ahead and started getting ready at noon for a 7pm party!
- Vincent
- $3.59 black suit jacket from Goodwill
- 'Michael Jackson' wig from a local party store ($15.99) that I altered to have a John Travolta widow's peak hairline.
- bolo tie ($2.99) from the cowboy section at a local party store.
- side burns ($2.99) cut from an Abe Lincoln beard b/c they didn't have any side burns!!!!
- white button down, black pants, and dress shoes (from his closet)
- fake earring ($1.99 for a pack of 8)
The party was so much fun. We didn't come home with a best costume victory...we better try harder next year...we have less than a year to prepare! ha!
Tuesday, October 25, 2011
Spooky Food Potluck - Great ideas!
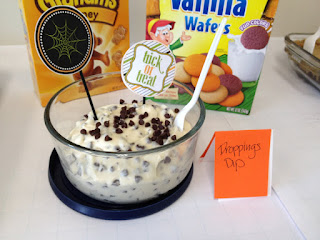
I work with some of the most creative people! We had a 'Spooktacular' Potluck and I was so impressed with the spooky food that was 'created'! (and this scary sign to set the tone).
Tip: For your scary foods, be sure to come up with a gruesome descriptive name and make a sign to put out with your dish.


 |
| did you notice the hand with the severed fingers in the lower left? gross...and awesome! |
Tip: For your scary foods, be sure to come up with a gruesome descriptive name and make a sign to put out with your dish.
"Digit Dip"
 |
| source |
"Graveyard 7-Layer Dip"

"Droppings Dip"

"Blood and Phlegm"

"Goblin Eyeballs (rolled in dirt)"

"Jack-o-Lantern Potatoes"

"DEVIL-ed eggs"

Have fun this Halloween making spooky food for your family and friends!
Subscribe to:
Posts (Atom)